
Fifth Avenue V8-318 5.2L VIN R 4-bbl (1986)
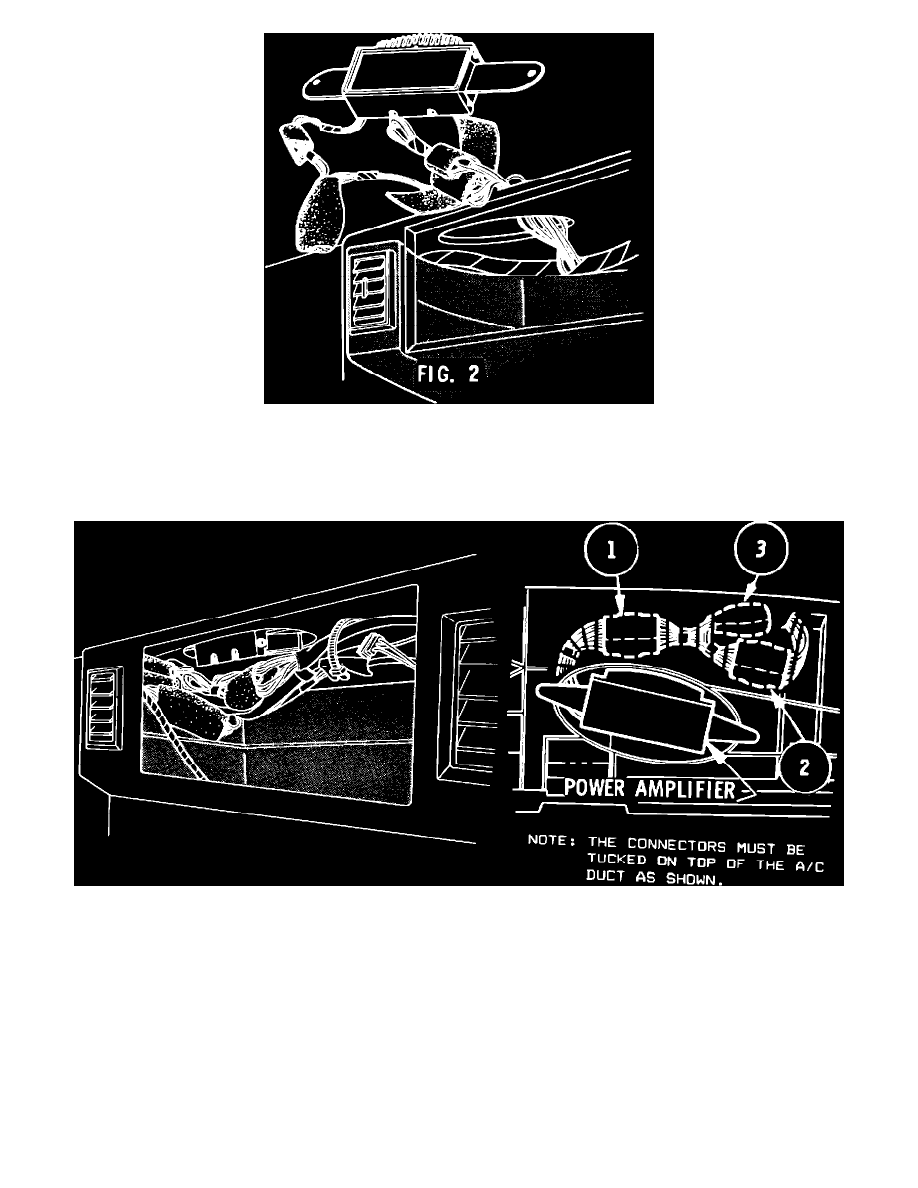
FIG. 2
6.
Wrap the remaining connectors together, (labeled 2, Figure 1). These connectors consist of: the one and four-pin connectors between the pop
suppressor and the vehicle wiring harness, and two sets of six-pin connectors between the power amplifier and the vehicle harness (Figures 1 and
2).
FIG. 3
7.
Tuck the pop suppressor module (labeled 3) and the connectors (labeled 1) through the power amplifier opening on top of the A/C duct work,
located to the left of the glove box cavity (Figure 3).
8.
Carefully tuck the connectors (labeled 2) forward so that the power amplifier can be reinstalled.
NOTE:
IT IS IMPORTANT THAT THE POP SUPPRESSOR AND THE RELATED WIRING DO NOT INTERFERE WITH THE
REINSTALLATION OF THE POWER AMPLIFIER. THE POWER AMPLIFIER MUST GO BACK IN ITS ORIGINAL
POSITION WITHOUT PLACING ADDITIONAL LOADS ON THE MOUNTING SCREWS.
9.
Reinstall the power amplifier.
10.
Reinstall the top cowl panel and trim pad assembly.